
Preparing for 3D printing
Choosing your own printer, being warned when something does not fit, and laying the part the right way.
Choosing your printer
Open the settings (the cogwheel in the ribbon, “Workspace settings”) and switch to the area “Workplane”. Under “Printer” you pick your printer from a list of over fifty common models, including Bambu Lab, Prusa, Creality, Anycubic, Elegoo and many more.
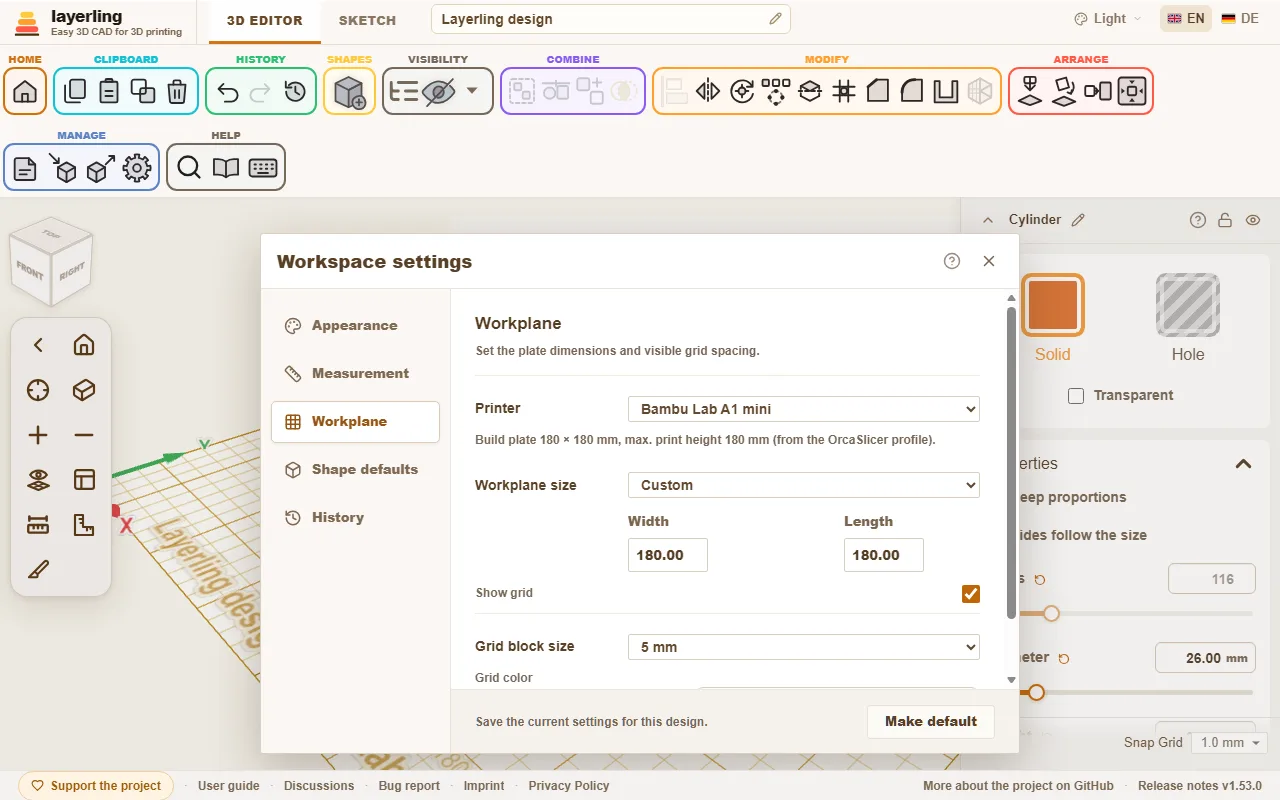
Three things happen:
- The workplane takes the size of the print bed.
- In the corner of the workplane appear the printer's name and its build volume. If the writing gets in the way, switch it off with “Plate labels” under “Workplane”; that also goes for the design's name at the front left.
- layerling warns when something does not fit.
The printer profiles come from OrcaSlicer, so they are the same ones your slicer knows. If you would rather work without a printer, choose “No printer - free size”. You can also set the size of the workplane by hand.
When something does not fit
A body that sticks out over the edge of the print plate is marked. A message tells you which sides overhang and by how much. It is the same if the part is too tall: the height counts from the lowest body, just as the slicer sets the model down.
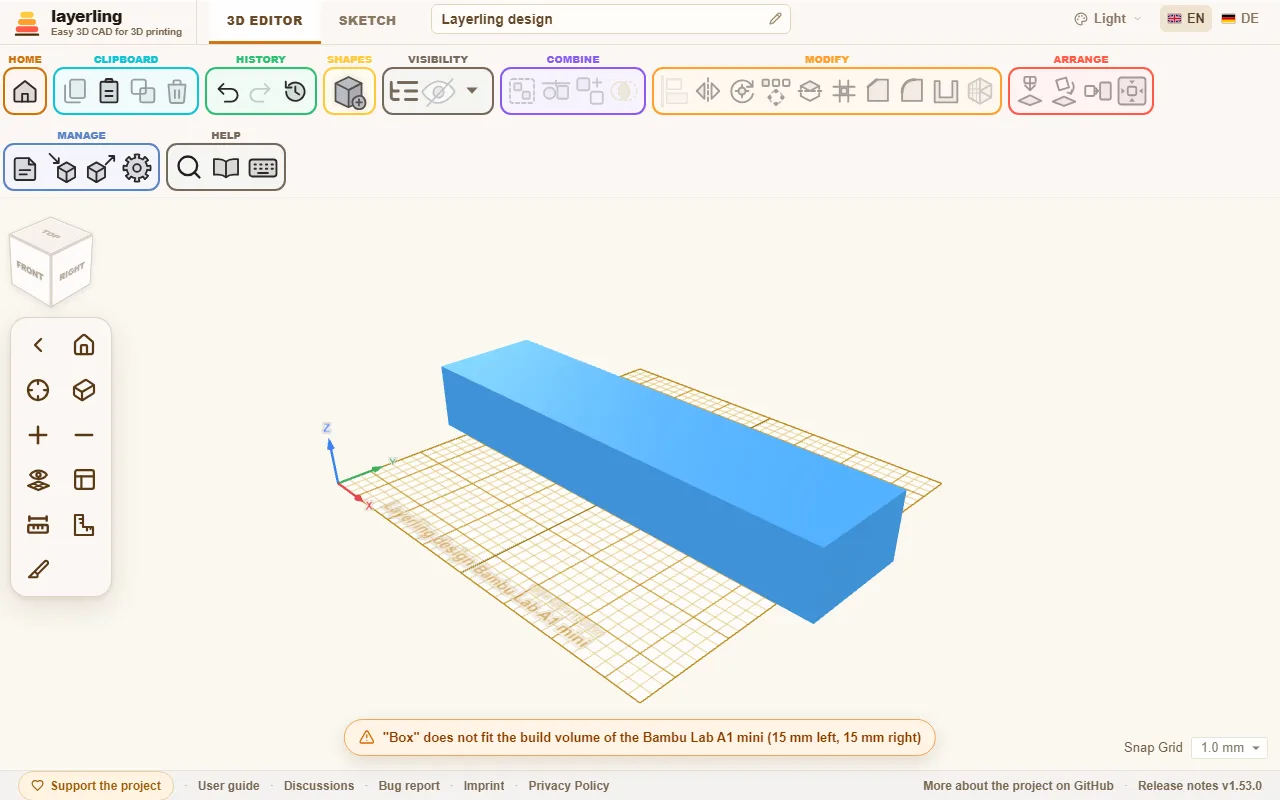
The warning does not stop you from working on. It is a hint so you do not find out only in the slicer that the part is too big. A part that is too big can often be split: cut it in two with “Split” and print both halves separately.
Laying the part right
How a part lies on the plate decides its strength and looks. Two tools in the “Arrange” area help:
- “Lay flat on face”: click a face and the part lies with that side down. The best print direction in one click.
- “Drop to workplane” (D): sets the part on the workplane when it floats somewhere in the air.
A few rules of thumb for direction:
- Large flat faces down. They stick best.
- Lay long, loaded parts so the layers do not run perpendicular to the load. Layers are the weakest direction.
- Avoid overhangs steeper than 45°, or give them supports in the slicer.
Finding overhangs
In the menu next to the eye (“Visibility”), Show overhangs switches the overhangs on. Every face that points down more steeply than 45° is then hatched red and white - that is where the printer would need supports. What rests on the plate stays clear. So you see while designing whether a sphere, an arch or a horizontal hole prints without supports; the teardrop hole is made for exactly that. Turn the part or lay it on another face with “Lay flat on face”, and the hatching follows at once.
How steep your printer manages is set in the settings under “Appearance”: from 30° (careful) to 70° (for printers with good part cooling). A face resting on another body is still marked - layerling only looks at the face itself.
Wall thickness, clearance and chamfers
- Walls should be at least two extrusion lines wide, so 0.8 mm with a 0.4 mm nozzle. Sturdy parts need 1.2 to 2 mm.
- Where two parts fit into each other you need clearance: usually 0.2 to 0.4 mm, depending on the printer. Make a small test pair before you print the big part.
- Many people lightly chamfer the lower edge that sits on the plate. That keeps the first layer from spreading ("elephant foot").
When you are ready
Choose “Export” and then STL or 3MF. STL is the simplest format. 3MF keeps names and colours of the individual bodies and is therefore handy when you print in several colours. The export window also shows how many grams and metres of filament the part would take printed solid. More in Files and saving.