
Solids and holes
How simple shapes become bores, slots and pockets, and how to change a group again later.
Ten rozdział nie jest jeszcze przetłumaczony na polski. Poniżej tekst angielski.
This is the most important idea in layerling, and it is quickly learned: Every shape is either a solid or a hole. A solid stays. A hole is a tool that takes material away.
Solid or hole
Select a shape and click „Bryła” or „Otwór” in its settings. The keyboard is faster: H makes the selection a hole, S makes it a solid again. Both are also in the menu a right click on the body opens. A hole is shown see-through so you can see where it sits. T makes a body see-through, say to look into a housing; a second press makes it opaque again. It works on the whole selection: if any body is already see-through, all become opaque, otherwise all become see-through.
As long as nothing is grouped, nothing happens with a hole. It just lies there and shows where something will disappear later.
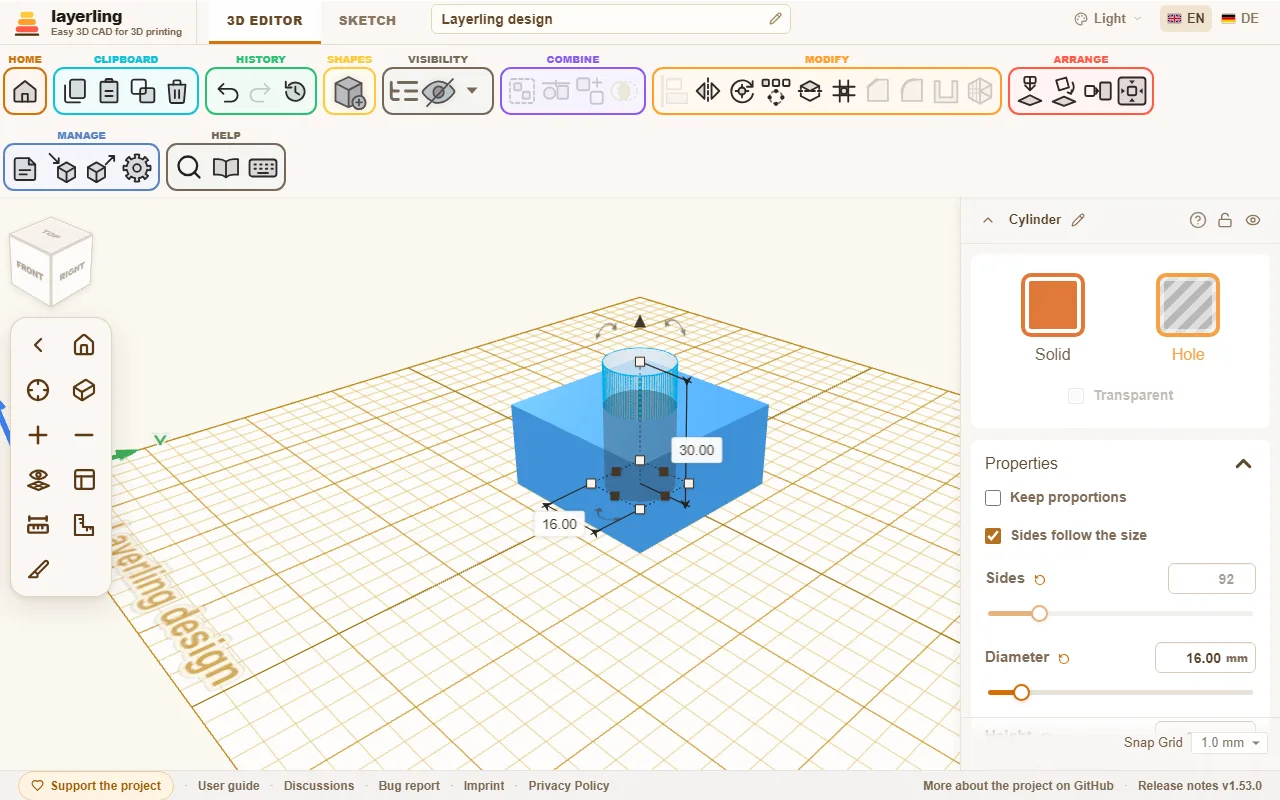
Grouping
Select solids and hole(s) and click „Grupuj” (Ctrl+G). Now the holes remove the material from the solids they touch. What remains is one single new shape.
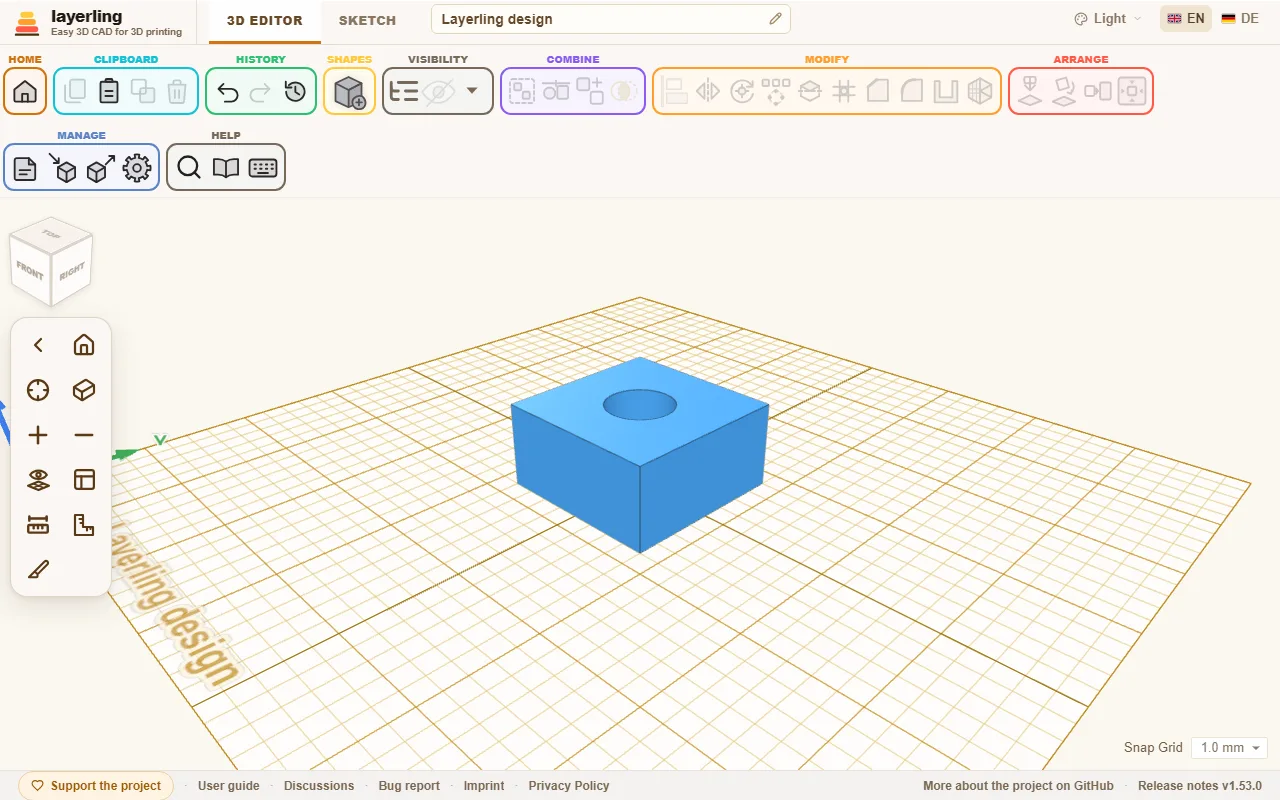
This is how you get:
- Bores: a cylinder as a hole through a body.
- Slots: an elongated box as a hole at the edge.
- Pockets: a hole that does not go all the way through.
- Threads in a part: a tapped hole as a hole, see Threads and mechanics.
If several solids are in the group, they are joined. Two solids that touch become a single part.
You can treat a group like a shape: move, rotate, colour, group again. „Rozgrupuj” (Ctrl+Shift+G) dissolves it and the individual parts are back.
Making a group a hole
A whole group can also be a solid or a hole. A simple rule applies:
- If the group consists only of solids (or only of holes), you switch it as a whole and its parts go along.
- If it contains both, say a cube with a bore, each part keeps its own state. The whole group then becomes a tool, but the bore stays a bore.
Bundling
Sometimes parts should only stay together without becoming one - a white logo on a black plate for a multicolour print, say. That is what „Zestaw” (Ctrl+B) is for, as in Tinkercad. A bundle moves, turns and resizes like a shape, but nothing is merged:
- Every part keeps its colour and stays a solid or a hole.
- Holes cut nothing.
- In an STL, 3MF or OBJ export every part is a body of its own; in 3MF and OBJ with its colour.
„Rozgrupuj” (Ctrl+Shift+G) takes a bundle apart again, E opens it for editing like a group. Chamfer, fillet and hollowing do not work on a bundle, because it is not one body: group it for that, or work on its parts one by one. If a hole in the bundle should cut after all, group the bundle (Ctrl+G).
Intersection
„Część wspólna” keeps only what two or more bodies have in common. Lay two overlapping shapes on top of each other, select both and click it. That turns a cylinder and a box into a piece with one round and one straight side. A group counts the way it looks, holes included. If a hole is selected too, what remains is what all the solids share with all the holes.
Editing a group
If a bore turned out too small, you do not have to dissolve the group and rebuild. Select the group and click „Edytuj grupę” in its settings, the folder icon in the object list, or press E. A double click on the group does the same, as in Tinkercad, on a bundle too; if you would rather not, switch off „Dwuklik otwiera grupę lub zestaw” in the settings. A part only starts to move once the pointer has been dragged a few pixels, so a shaky click or double click does not nudge it. The parts now lie separately and you change them with every tool: make a hole larger, move a body, add a hole.
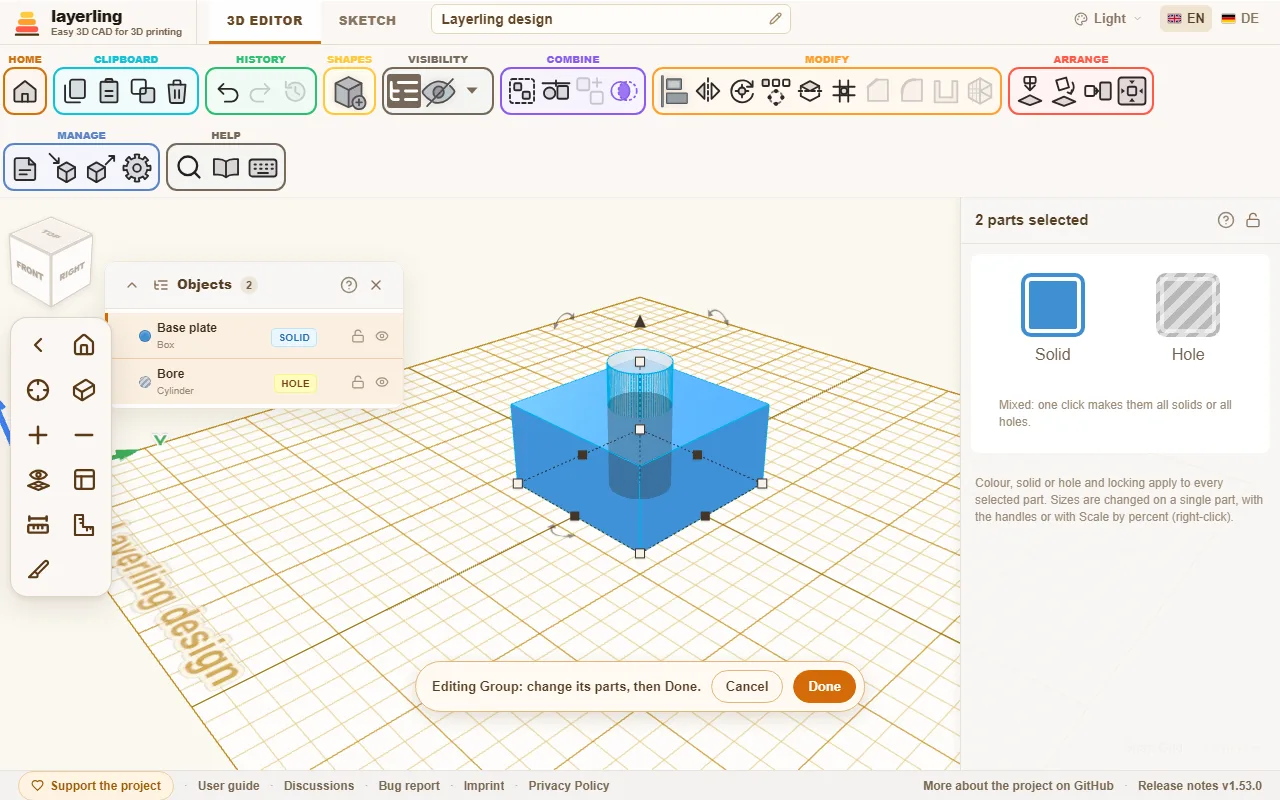
A bar appears at the bottom of the picture. „Gotowe” rebuilds the group, with its name, its colour and its state as solid or hole. „Anuluj” puts it back untouched.
If one of the parts is itself a group, you can edit it the same way, and so on as deep as your design goes. The bar shows where you are, for example "Bracket › Screw boss". „Gotowe” and „Anuluj” always finish the innermost group and take you one level back out. While you are inside a group, only the groups among its parts can be edited; to edit another one, finish first.
Unlike „Rozgrupuj”, which takes a group apart for good, editing keeps the group: its name and settings stay, and you can always go back with „Anuluj”.
A note: fillets and chamfers you had put on the whole group are lost on rebuild. The bar tells you so.
Splitting
„Podziel” in the „Modyfikuj” area cuts the selection in two with a plane - a part too big for the print bed, say, or one you want to see the inside of. Select one or more solids or holes and click it. A translucent plane shows exactly where the cut will go; nothing changes until you apply it.
- „Orientacja płaszczyzny”: X makes an upright cut between left and right, Y between front and back, Z a horizontal cut between top and bottom. The axes are named as on the Position card, with Z up; Z is where the plane starts.
- „Położenie płaszczyzny”: where the plane crosses, with the slider or typed in. It starts in the middle. You can also drag the arrow head on the plane; the plane moves along the arrow in 0.1 mm steps.
- „Wybierz ścianę”, the button next to the position, lays the plane on a face: click it, then click the face. Orientation, both rotations and position are set to match. While you pick, a blue plane under the pointer shows the face it will take. A face of a body that is not selected works too, to line the cut up with it, but the plane stays within the selection. Esc stops picking and leaves the plane where it was.
- The two rotation sliders below turn the plane about the other two axes, up to 180° either way, for an angled cut. They can be combined.
„Podziel model” or Enter makes the cut, Esc cancels (while picking a face, the first Esc only stops picking). Every object the plane crosses becomes two closed bodies, named after their side, for example "Box (Z+)" and "Box (Z-)"; objects it misses stay as they are. A hole becomes two holes, and a hollowed body keeps its cavity. Both halves stay where they were - for printing, lay each one on its cut face with „Połóż płasko na ścianie”.
The halves are plain meshes: settings such as a cylinder's sides or a text's lettering are gone, so set those first. Ctrl+Z brings the original back in one step. Locked and hidden objects cannot be split.
Separating parts
If a shape consists of several separate pieces, such as text made of single letters, „Rozdziel części” splits it into independent shapes.